Blog
What Is The Next Level Up On Motherboard After B650 – A Detailed Guide!

The next level up from a B650 motherboard is the X670 and X670E, offering enhanced performance, advanced features like full PCIe 5.0 support, and better future-proofing, making them ideal for gamers, content creators, and enthusiasts.
In this article, we’ll explore the next tier of motherboards after the B650, focusing on the X670 and X670E chipsets, which are ideal for users seeking enhanced performance, more features, and future-proofing their systems.
Understanding the B650 Motherboard:

Before diving into the upgrades, it’s important to understand what the B650 motherboard offers. The B650 chipset is part of AMD’s mid-range lineup, designed for users who want a balance of performance and affordability.
It supports AMD Ryzen 7000 series processors, PCIe 5.0 (in some models), and has a solid feature set suitable for gaming, content creation, and everyday computing. However, for users who need more advanced features or higher performance, moving up to the next tier is a logical step.
The Next Level Up: X670 and X670E Motherboards
The natural progression from a B650 motherboard is to an X670 or X670E motherboard. These chipsets are part of AMD’s high-end lineup, designed for enthusiasts, gamers, and professionals who require the best in terms of performance, connectivity, and expandability.
Key Features of X670 and X670E Motherboards:
- Enhanced PCIe Support: While the B650 chipset may offer PCIe 5.0 support on select slots, X670 and X670E motherboards typically provide more extensive PCIe 5.0 support across multiple slots. This is particularly beneficial for users looking to install the latest GPUs, NVMe SSDs, and other high-speed components.
- Advanced Overclocking Capabilities: X670 and X670E motherboards come with more robust power delivery systems, allowing for better stability and higher overclocking potential. This makes them ideal for users who want to push their CPUs to the limit.
- More USB and Connectivity Options: These motherboards offer more USB ports, including USB 4.0 in some models, and better connectivity options like dual Ethernet ports or faster Wi-Fi 6E. This is crucial for users who need multiple high-speed connections for peripherals and network devices.
- Dual or Triple GPU Support: Unlike the B650, which is often limited to a single GPU, X670 and X670E motherboards can support dual or even triple GPU setups, making them perfect for high-end gaming rigs or professional workstations that require intensive graphics processing.
- Expanded Storage Options: With more M.2 slots and SATA ports, these motherboards can accommodate multiple SSDs and hard drives, providing ample storage space for large files, games, and applications.
- Future-Proofing: The X670E, in particular, is designed with future-proofing in mind, offering the latest technologies and standards to ensure compatibility with upcoming hardware releases.
X670 vs. X670E: Which One Should You Choose?
While both X670 and X670E motherboards offer significant upgrades over the B650, there are some differences to consider:
- X670 Motherboards: These provide a strong balance between performance and features, offering PCIe 5.0 support on select slots, advanced overclocking, and a wide range of connectivity options. They are suitable for users who need high performance but may not require the absolute latest technologies.
- X670E Motherboards: The “E” stands for “Extreme,” and these motherboards offer the most comprehensive set of features, including full PCIe 5.0 support across all slots, even more robust power delivery for extreme overclocking, and the latest connectivity standards. X670E motherboards are ideal for enthusiasts and professionals who demand the very best.
Also Read: Will Updating My Motherboard Fix My Keyboard Not Working – The Role of BIOS and Driver Updates!
Who Should Consider Upgrading?
Upgrading from a B650 to an X670 or X670E motherboard makes sense for several types of users:
- Enthusiasts and Overclockers: If you enjoy pushing your hardware to its limits, the advanced power delivery and overclocking features of the X670/X670E will be beneficial.
- Gamers: For gamers looking to maximize performance with the latest GPUs and high-speed storage, these motherboards provide the necessary infrastructure.
- Content Creators: Professionals who work with video editing, 3D rendering, or other resource-intensive tasks will benefit from the expanded storage options, multiple GPU support, and faster connectivity.
- Future-Proofers: If you want to ensure your system is ready for the latest and upcoming technologies, the X670E offers the best future-proofing options.
FAQ’s
1. What is the main difference between the B650 and X670 motherboards?
The X670 offers more PCIe 5.0 support, better overclocking capabilities, and additional connectivity options compared to the B650.
2. Is the X670E better than the X670?
Yes, the X670E provides full PCIe 5.0 support across all slots and is designed for extreme performance, making it superior to the X670.
3. Who should consider upgrading to an X670 or X670E motherboard?
Enthusiasts, gamers, content creators, and those looking to future-proof their systems should consider upgrading.
4. What are the benefits of PCIe 5.0 on X670 and X670E motherboards?
PCIe 5.0 offers double the bandwidth of PCIe 4.0, which is beneficial for high-speed GPUs and NVMe SSDs.
5. Can I use multiple GPUs on an X670 or X670E motherboard?
Yes, these motherboards support dual or even triple GPU setups, ideal for gaming or professional workstations.
6. Is overclocking better on X670/X670E compared to B650?
Yes, X670 and X670E motherboards have more robust power delivery, allowing for better and more stable overclocking.
7. Do X670/X670E motherboards offer more storage options than B650?
Yes, they provide more M.2 slots and SATA ports, accommodating multiple SSDs and hard drives.
8. Are X670 and X670E motherboards more expensive than B650?
Yes, due to their advanced features and performance, X670 and X670E motherboards are generally more expensive.
9. What connectivity improvements do X670/X670E motherboards offer?
They offer more USB ports, including USB 4.0, and better networking options like Wi-Fi 6E and dual Ethernet ports.
10. Is it worth upgrading from a B650 to an X670 or X670E motherboard?
If you need advanced features, better performance, and future-proofing, upgrading is definitely worth considering.
Conclusion
Upgrading from a B650 to an X670 or X670E motherboard is a significant step up, offering enhanced performance, more features, and better future-proofing. Whether you’re a gamer, content creator, or tech enthusiast, these motherboards provide the tools needed to build a powerful and versatile PC. While the B650 is a solid choice for many users, those seeking the best performance and latest technologies will find the X670 and X670E to be worthwhile investments.
Choosing the right converter for your drive system can be confusing. You need to take several factors into consideration to ensure reliable and optimal performance.
If you are an electrical or mechanical engineer, you must be working with motor and drive systems. As you know, drive systems are components working together to transform energy into mechanical motion. And converters are needed for adjusting the electrical power supply as per the specific needs of electric motors.
You need a converter to control the speed, torque, and other attributes of motors. So, it is important to choose the right drive system. An incorrect one can raise energy consumption, cause system failure, and reduce component lifespan.
What Are the Key Factors to Consider?
Here are the key factors that you should carefully consider when choosing a converter for a drive system.
● Input & Output Voltage
You need to determine the range of input voltage of your power source. You must also determine the output voltage that your drive system requires. It is important to ensure that the converter you choose is able to handle the variations in voltage. Choose a converter that produces steady output.
● Power & Current
Your drive system requires a certain amount of power and current. Measure the total power in watts and the total current in amps. Now, you need to consider the power rating of the converter. The rating should exceed the maximum load of your system. This will help ensure that instances of overloading are prevented and associated damage is avoided.
● Thermal Management
Converters tend to generate heat. And this happens particularly when it is under load. So, you need to make sure that the cooling mechanism is adequate. Go for one that has a heatsink. Otherwise, you will have to create sufficient ventilation in other ways.
● Efficiency
You should try to keep heat generation and power loss to a minimum. It will improve performance and extend the lifespan of your systems. You can achieve that by choosing converters with high efficiency. You will find highly efficient converters particularly necessary for battery-powered applications.
For example, if you get Siemens SINAMICS Converters, you will be able to regulate the torque and speed of electric motors. So, you can save energy and reduce costs through motor performance optimization.
● Load & Line Regulation
Load regulation is the ability of a converter to keep its output voltage stable even if load conditions vary. Then comes line regulation. It is the ability to maintain the stability of output even if there are fluctuations in input voltage. So, you want to make sure that the converter you choose has load and line regulation ability.
● Protection & Safety Features
It is extremely important that you get a converter with built-in safety features. Consider features for protection against short-circuit, over-current, and over-voltage. These protections will be needed to ensure that your drive system is safe from potential damage.
● Size & Form Factor
You may also base your choice of converter on size and shape. Consider the physical space you have for installing the converter. You reasonably want to go for a size that can fit into your drive system comfortably. You also want to consider the form factor for a seamless fit.
● Compatibility
You want to ensure that the interface of the converter you choose is also compatible with the interface of your system. The interface of your converter can be analogue or digital. So, checking the compatibility is important to ensure seamless integration of the converter with your drive system.
For example, you will need an operator interface for monitoring and adjusting motors controlled by drive system converters. Siemens SIMATIC HMI Panels is an example of such an operator interface. So, you need to check if your converter will be compatible with the drive system as well as the operating interface.
● Availability & Cost
You also need the different choice factors with cost considerations. The goal should be to ensure that the converter is available within your budget. And you also need to ensure that the chosen converter is not a compromise of reliability or quality.
| Factors to consider | What to look for? |
| Voltage & Current Requirements | Output voltageInput voltageOutput current |
| Power & Thermal Efficiency | Power lossHeat generationHeat dissipation |
| Load & Line Control/ Output Voltage Stability | Despite Load Current VariationsDespite Input Voltage Variations |
| Protection & Safety Features | Overcurrent ProtectionOvervoltage ProtectionOver-Temperature ProtectionShort-Circuit Protection |
| Size & Form Factor | Physical DimensionsFit Within Available SpaceEase of Installation |
| Additional Factors | Frequency RangeCost-Quality-Reliability Balance |
Table: Overview of factors to consider when choosing
Types of Converters You Can Get
You have also learned about the factors to consider when choosing a converter for your drive system. Now, check out the types of converters available.
AC-DC Converters
You will need these converters to convert AC voltage into DC. These converters are a must-have to run devices requiring DC power from AC sources. These are the topologies you will find for these converters.
- Flyback Converters: This topology is known for its versatility. It is used particularly in AC-DC power supplies where the input and output are isolated.
- Power Factor Correction (PFC) Converters: This topology is used for making AC-DC converters more efficient. It ensures that the input current and voltage are in phase. So, reactive power and harmonic distortions are reduced.
- LLC Resonant Converters: This topology is commonly used in power supplies with high efficiency. It involves employing resonance to ensure that the switch is turned on or off upon detecting zero voltage.
- Two-Switch Forward Converters: This is an advanced topology compared to the single-switch flyback one. S, it offers better performance in many specific applications.
DC-DC Converters
You will need these converters for stepping up or stepping down the levels of DC voltage. So, you will find its common applications in fields like industrial, automotive, and consumer electronics. Here are the topologies you will find.
- Buck converters: Used for lowering the DC voltage input. A reduced output voltage is generated.
- Boost Converters: Raise the DC voltage input. An increased output voltage is achieved.
- Buck-Boost Converters: used for producing an output voltage that can either be lower or higher than the input voltage. So, both boost and buck modes are run.
- Cuk Converters: Use for getting a controlled DC output from sources that have a voltage either lower or greater than the required output. So, it combines the features of both boat and buck converters.
- Inverting Buck-Boost Converters: Use for generating an output voltage that is negative or inverted with respect to the input voltage. The generated output voltage can also have either a lower or higher magnitude.
Frequency Converters
These are the converters needed for changing the frequency of a source of AC power. The purpose of frequency converters is to control the speed at which AC motors rotate.
Voltage Converters
Voltage converters are designed to help change an electrical power source’s voltage level. Therefore, you will find its use in stepping down and stepping up voltage. That will depend on your specific application.
Ready to Choose the Right Converter?
There is no converter that fits every drive system readily. The right one for you depends on your unique needs. A number of key factors are to be considered when choosing a converter. You should check the voltage input-output dynamics. You should look for thermal and power efficiency.
You should also look for power ratings and safety features. Line and load control mechanisms must also be considered. You will also have to check how well the converter can sit in your existing drive system.
Intrathecal administration delivers medication directly into the cerebrospinal fluid, targeting the central nervous system (CNS) more efficiently than systemic routes. This method, using the intrathecal route, is renowned for effectively managing severe pain and spasticity while minimizing systemic side effects.
However, questions about its safety remain. This article explores how intrathecal drug delivery works, its potential risks, essential precautions, and how it compares to other CNS treatments—offering a clear, comprehensive overview of its safety in clinical practice.
How Intrathecal Drug Delivery Works
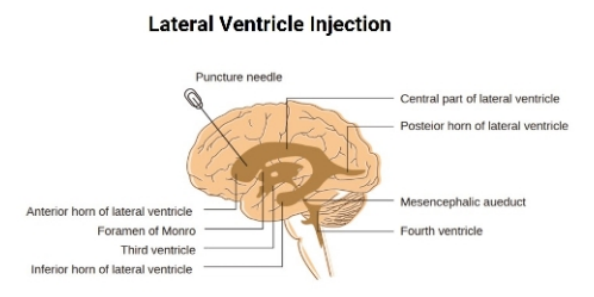
Direct Infusion into the Cerebrospinal Fluid
Intrathecal drug delivery involves the infusion of medication directly into the cerebrospinal fluid (CSF). This targeted approach allows for higher drug concentrations at the site of action, offering potent therapeutic effects with reduced systemic exposure.
Patients benefit from rapid relief of symptoms due to the proximity to the CNS, which is especially beneficial in treating chronic pain and neurological disorders that do not respond effectively to oral medications.
Devices and Procedure Overview
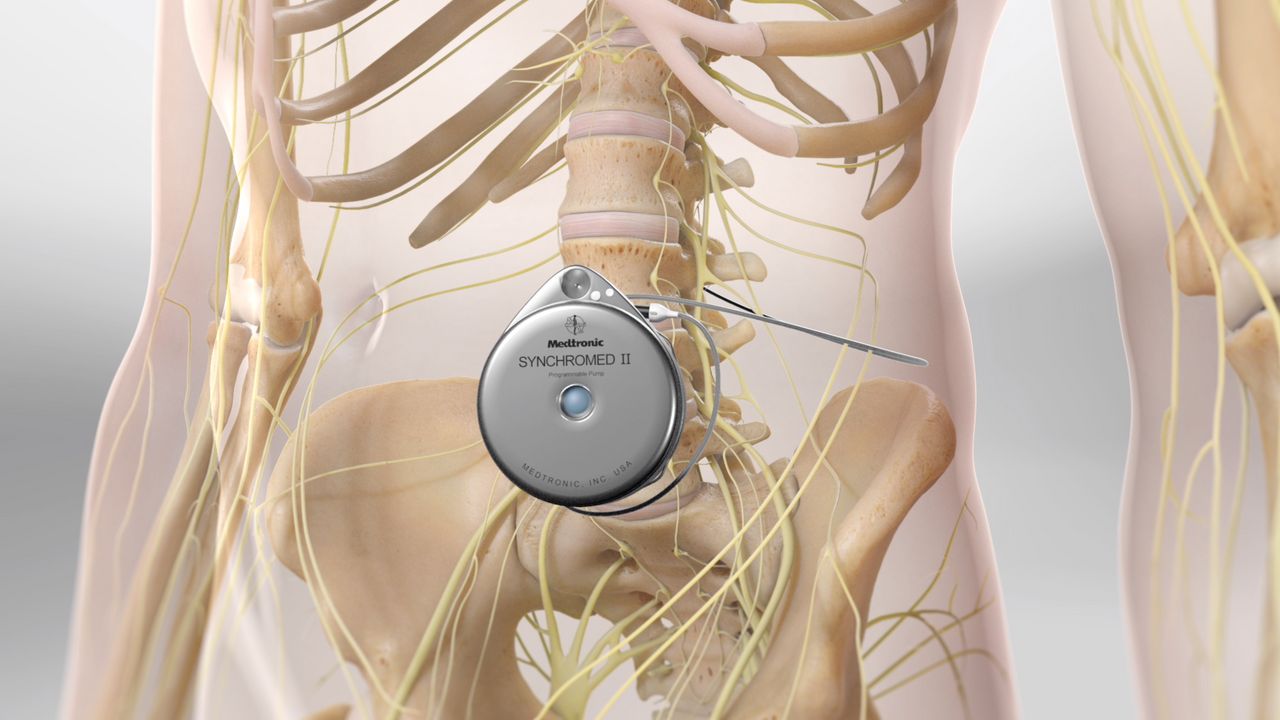
The delivery system typically involves an implanted pump and catheter that administer medication continuously or on demand. A surgeon implants the pump subcutaneously, usually in the abdominal region, connecting it to a catheter placed in the intrathecal space of the spinal cord. This setup allows precise control of drug dosing, tailored to the patient’s needs, enhancing therapeutic efficacy while mitigating adverse effects.
Typical Treatment Settings and Uses
Intrathecal drug administration is predominantly used in chronic pain management, spasticity treatment, and certain CNS disorders. Patients who do not find relief through conventional therapies may be candidates for this procedure.
Treatment settings vary, from hospitals to outpatient clinics, and in some cases, home-based therapies are feasible, provided strict monitoring protocols are followed to ensure safety and effectiveness.
Known Risks and Adverse Effects
Common Short-Term Side Effects
Short-term side effects of intrathecal administration can include headache, dizziness, and nausea, often resulting from initial dose adjustments. Patients may experience discomfort at the implant site or mild infections. These side effects are usually managed through careful monitoring and promptly adjusting the medication dosage to alleviate the symptoms while maintaining therapeutic benefits.
Long-Term Complications and Device Failures
Long-term complications may arise from device malfunctions, such as pump failure or catheter dislodgement. These can lead to suboptimal drug delivery, necessitating surgical intervention for correction or replacement.
Other complications include granuloma formation, which can obstruct drug flow. Regular follow-ups and device checks are essential to minimize these risks, ensuring sustained therapeutic efficacy.
Risk Comparison with Other Routes
Compared to systemic administration methods like oral or intravenous routes, intrathecal delivery usually presents fewer systemic side effects. Direct CNS delivery reduces peripheral exposure, lowering the risk of general side effects. However, the invasiveness of intrathecal administration introduces unique risks, placing significant importance on careful patient selection and meticulous management to maintain safety.
Patient Safety Measures and Monitoring
Proper Screening and Candidate Selection
The safety of intrathecal administration begins with thorough patient screening. Physicians assess medical history, current health status, and previous response to treatments to identify suitable candidates. Those with infections, coagulopathy, or anatomical abnormalities in the spinal area may be excluded. Accurate patient selection reduces complication rates and optimizes treatment outcomes.
Trialing and Dose Titration Protocols
Before permanent implantation, a trial phase helps assess patient response to the therapy. During this phase, controlled doses are administered to evaluate efficacy and tolerability. Dose titration is crucial, starting with minimal effective amounts, gradually increasing to achieve desired effects while avoiding overdose and toxicity, ensuring safe administration.
Monitoring for Infection and Malfunction
Regular monitoring post-implantation is critical for detecting infections and device malfunction early. Patients undergo routine follow-ups where professionals check implantation sites, device function, and medication levels.
Early detection allows prompt intervention, preserving therapy benefits and preventing serious complications, ensuring continuous, effective pain and symptom management.

Safety in Clinical Practice
Regulatory Guidelines and Best Practices
Clinical guidelines and regulatory standards outline the safe practice of intrathecal drug administration. Institutions develop protocols aligned with these guidelines to maintain high safety standards. Training for healthcare providers ensures competent handling and management of devices, as well as appropriate patient care, reducing risks associated with the procedure.
Hospital vs. Home-Based Therapy
Hospital-based intrathecal therapy offers close monitoring, ideal for new or high-risk patients. In contrast, home-based setups may be suitable for stable patients with unwavering compliance and the support of trained caregivers. Each setting has its trade-offs, with hospitals offering immediate access to care and homes providing comfort, requiring a thorough assessment to determine the most suitable option.
Conclusion
Intrathecal administration represents a promising alternative for patients refractory to conventional treatments, offering targeted therapy with minimized systemic side effects. While the procedure carries specific risks inherent to its invasive nature, strict adherence to safety protocols can mitigate these concerns.
Careful patient selection, rigorous monitoring, and compliance with established guidelines are paramount to ensuring its safety and efficacy in clinical practice. Through these comprehensive measures, intrathecal administration provides a viable option for managing complex CNS conditions.

When a tenant is evicted, property owners are often left with more than just an empty unit—they’re left with the burden of clearing out what’s left behind. From abandoned furniture and trash to potential damages, eviction cleanouts can be overwhelming without the right approach. This guide walks you through the entire eviction cleanout process, helping you protect your investment, comply with legal requirements, and prepare your property for the next tenant.
Understanding the Basics of an Eviction Cleanout
An eviction cleanout occurs after a tenant has been legally removed from the premises, and their personal belongings remain behind. While it may be tempting to immediately dispose of everything left in the unit, eviction cleanouts must be handled carefully to avoid legal repercussions.
Different states and municipalities have specific laws regarding tenant property after eviction. Some require a holding period before disposal, while others allow immediate removal. It’s critical to understand your local laws before beginning the cleanout process.
Step 1: Confirm Legal Completion of the Eviction
Before starting any cleanout, make sure the eviction is fully legal and finalized through the court system. A sheriff or authorized official should serve the eviction notice and perform the lockout. Starting the cleanout before this step is complete can lead to legal disputes.
Also, document the state of the property immediately after the eviction. Take photos or video footage for your records to avoid potential tenant claims of theft or damage.
Step 2: Inventory and Store Abandoned Belongings (If Required)
In many jurisdictions, landlords are required to hold a tenant’s property for a specified period. This is known as a “notice of abandoned property.” During this time, the former tenant has the right to claim their belongings.
If this applies to your area:
- Create an inventory list of items left behind.
- Store belongings in a secure location, either on-site or off-site.
- Notify the tenant in writing, including the deadline for retrieval and any storage fees they may owe.
If the tenant does not respond within the allowed timeframe, you can proceed with disposal or donation.
Step 3: Remove Trash and Hazardous Materials
Once you’ve addressed any legally sensitive belongings, the next phase is clearing out all remaining debris—including trash, spoiled food, and potentially hazardous materials. Items left behind can range from broken furniture to biohazards like mold or used needles.
To make the process more manageable, consider renting a roll-off dumpster in Evanston, which provides a convenient solution for disposing of large volumes of waste. If you come across hazardous or questionable items, it’s best to bring in a professional cleanout team with experience handling such materials safely and in compliance with regulations.
Step 4: Hire a Professional Eviction Cleanout Service
While some landlords choose to handle cleanouts themselves, hiring a professional cleanout company is often the fastest and most efficient option. These companies specialize in clearing out debris, hauling unwanted items, and even performing deep cleaning afterward.
Benefits of using a professional service include:
- Speedy turnaround
- Proper disposal of waste
- Reduced risk of injury or exposure to hazardous conditions
- Optional deep-cleaning and minor repair services
Choose a licensed and insured company with experience in eviction scenarios. Ask for references or check online reviews to ensure reliability.
Step 5: Deep Clean and Repair
Once everything has been removed, the property will likely need a thorough cleaning. Depending on how the tenant left the space, this could involve:
- Carpet shampooing or floor replacement
- Wall repairs and repainting
- Pest control
- Plumbing or electrical inspections
Cleaning and minor renovations not only restore the unit to livable condition but also increase the rental value and appeal to new tenants.
Step 6: Update Security Measures
After an eviction, it’s important to ensure the property is secure. Change locks, reprogram keypads, and inspect windows or other access points. This protects the property and provides peace of mind for future tenants.
Step 7: Prepare for New Tenants
With the property cleaned and restored, you’re ready to market it again. Consider using this opportunity to upgrade appliances or make energy-efficient improvements that can help justify higher rental rates and attract quality tenants.
Also, review your lease agreements and screening process to help avoid future issues. Stronger lease clauses and thorough background checks can go a long way in protecting your investment.
Final Thoughts
Eviction cleanouts may be a challenging part of property management, but with the right knowledge and support, you can handle them effectively. Always stay informed about your legal responsibilities, and don’t hesitate to call in professionals when needed. A clean, well-maintained property is not only easier to rent but also a valuable long-term asset.
-

 Tech2 months ago
Sotwe STW Explained How a Radical Platform is Redefining Online Expression
-

 Entertainment4 months ago
How Do I Turn On the Beatbot?
-
 Motherboard Guide11 months ago
Are B750 Motherboard A Good Choice – A Complete Overview!
-
 Motherboard Guide11 months ago
Are Gigabyte Motherboards Good – A Comprehensive Review!
-

 Blog4 months ago
Her Love Is A Kind Of Charity Password – The Hidden Meaning Behind the Phrase!
-
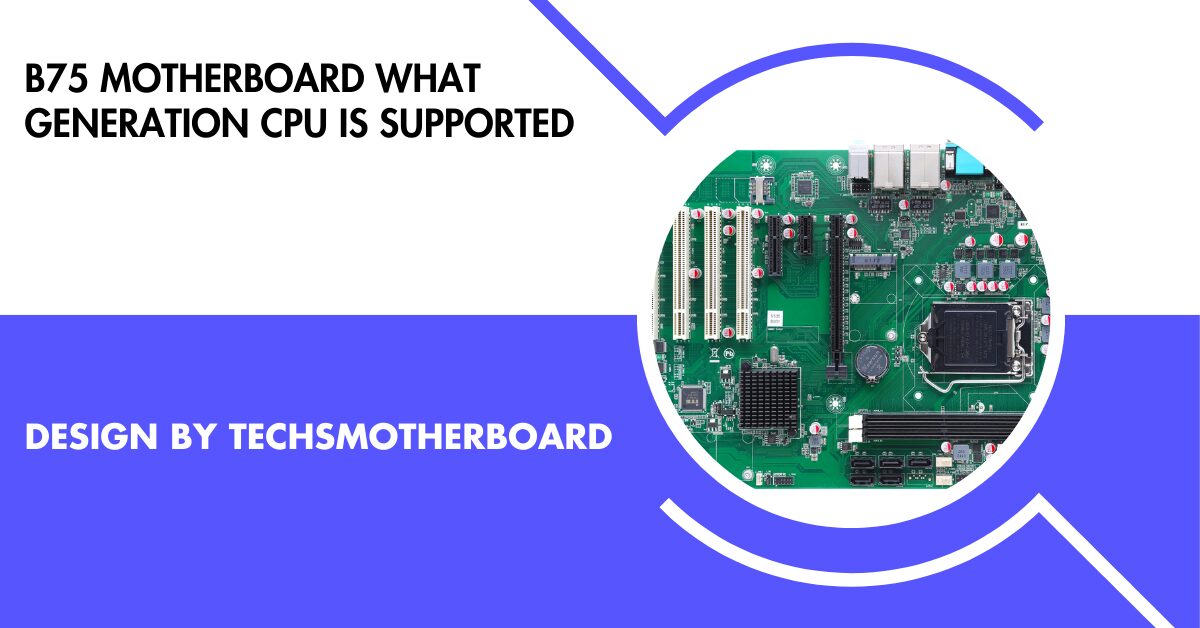 Motherboard Guide8 months ago
B75 Motherboard What Generation Cpu Is Supported – B75 Motherboard Cpu Support!
-
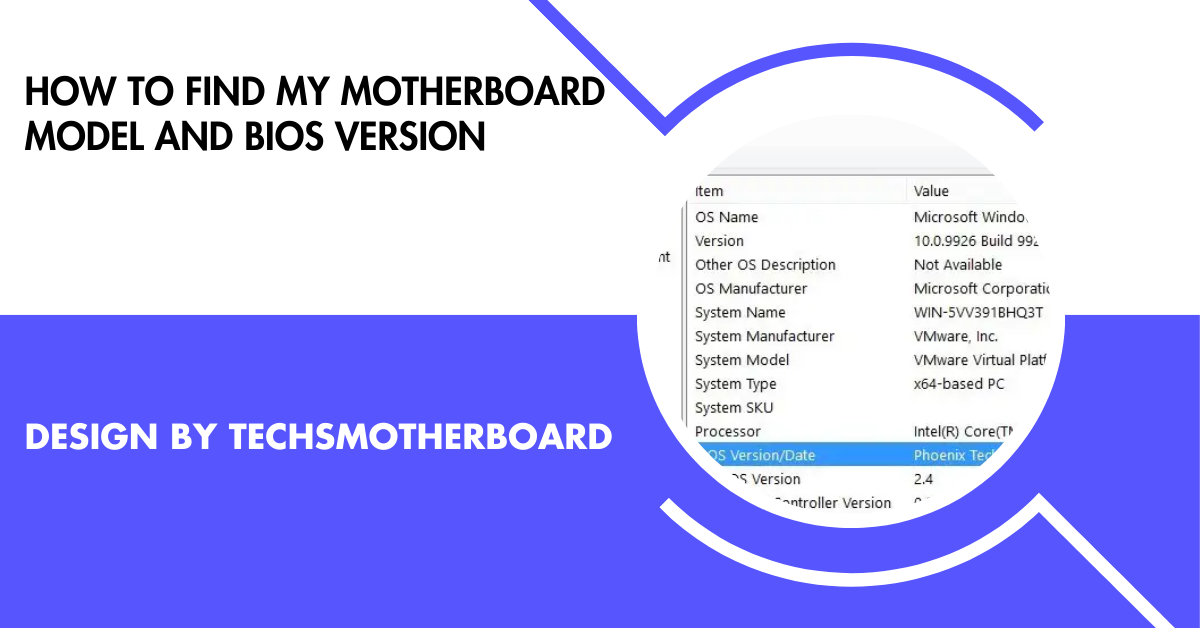 Blog10 months ago
How To Find My Motherboard Model And Bios Version – A Detailed Overview!
-

 Entertainment5 months ago
Fire Kirin Xyz Login – A Complete Guide to Accessing and Playing Online!